So, you have downloaded a file that is supposed to be a JSON. Before processing the file, it might be wise to check if that file is actually a valid JSON file.
Here is how to check if a file is indeed a valid JSON file:
if jq empty $File 2>/dev/null; then
  ThisFileIsAValidJSONFile="true"
else
  ThisFileIsAValidJSONFile="false"
fi
Sometimes, one wants to check if Apache2 is running. This is one way how to do it in BASH:
if [ "$(systemctl is-active apache2)" = "active" ]; then
  echo "Apache2 is active"
  ApacheIsRunning=1
else
  echo "Apache2 is not active"
  ApacheIsRunning=0
fi
Sometimes, one wants to put a nextcloud installation into “Maintenance mode” from the command line. Assuming your nextcloud is installed in /var/www/nextcloud/, the following command will put it in maintenance mode:
If you want to check the state of maintenance mode:
if [ "$(sudo -u www-data php /var/www/nextcloud/occ status | grep -c "maintenance: true")" != "0" ]; then
  echo "Nextcloud is in maintenance mode"
else
  echo "Nextcloud is not in maintenance mode"
fi
Sometimes, one wants to put a yourls installation into “Maintenance mode” from the command line. Assuming your yourls is installed in /var/www/example.com/x/, the following command will put it in maintenance mode:
touch /var/www/example.com/x/.maintenance
The following command will deactivate maintenance mode:
Sometimes, one wants to put a wordpress installation into “Maintenance mode” from the command line. Assuming your wordpress blog is installed in /var/www/myblog.example.com/, the following command will put it in maintenance mode:
If you want to set up some kind of routing (of IP packets) on Debian 13, you first have to ensure that “Forwarding” is activated. By default it isn’t. Activation of Forwarding means that packets coming in at one interface might be transferred to another interface.
The following two commands will show you if forwarding is activated (“1”) or not (“0”):
RustDesk is an open-source remote desktop software that allows you to access another PC’s desktop, for example to help friends and family when they have problems, or let them help you.
It is a free alternative to TeamViewer, AnyDesk, and similar programs.
A client application is needed on both PCs. A remote desktop access is only possible when the client is started, access is impossible without the Client being started, so the user is always in control.
How to install:
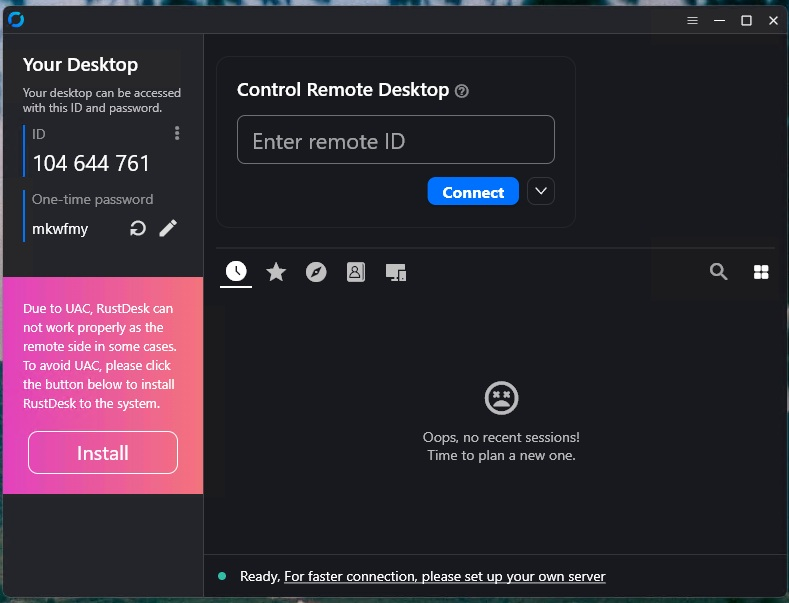
Download the latest Rustdesk client from here: https://rustdesk.com Once downloaded, start the file:
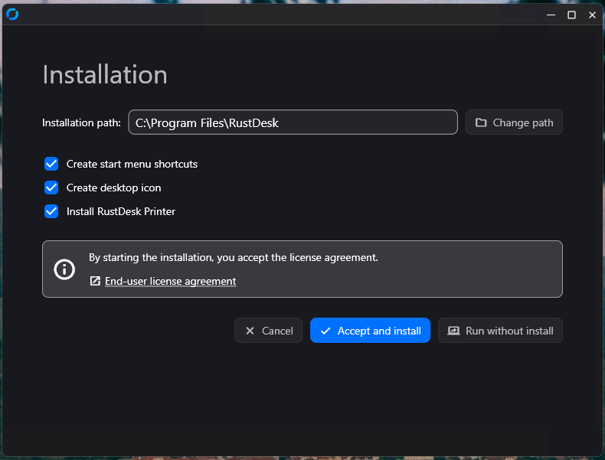
In the lower left corner, click on “Install”.
Adapt to your needs and click on “Accept and install”.
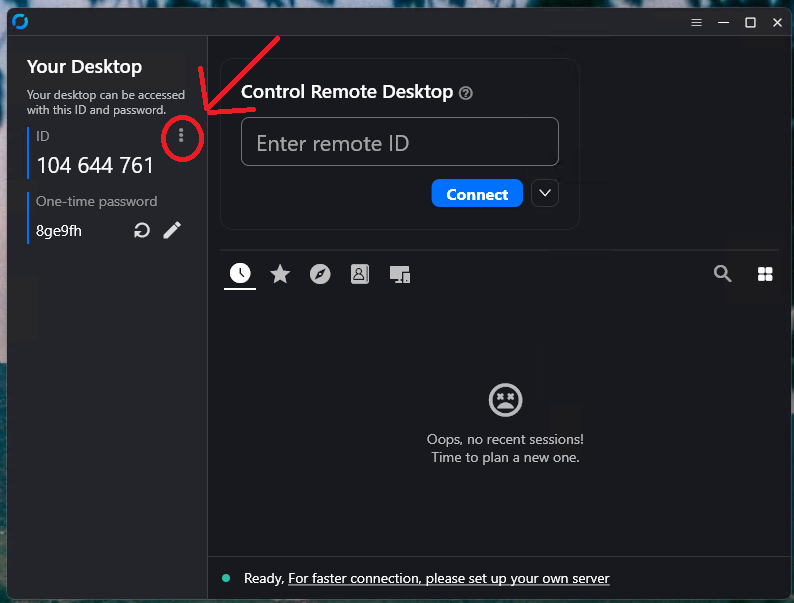
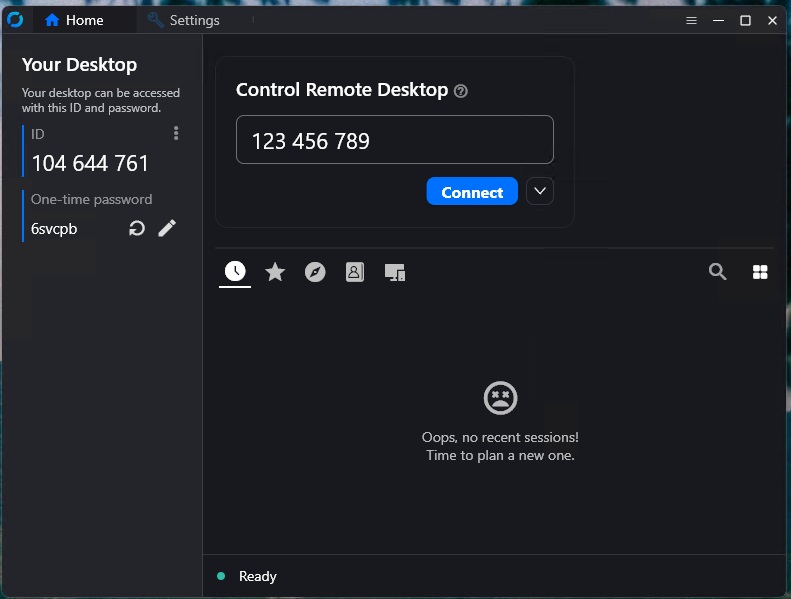
Afterwards, you should have an Icon for Rustdesk on your desktop, and Rustdesk should be running:
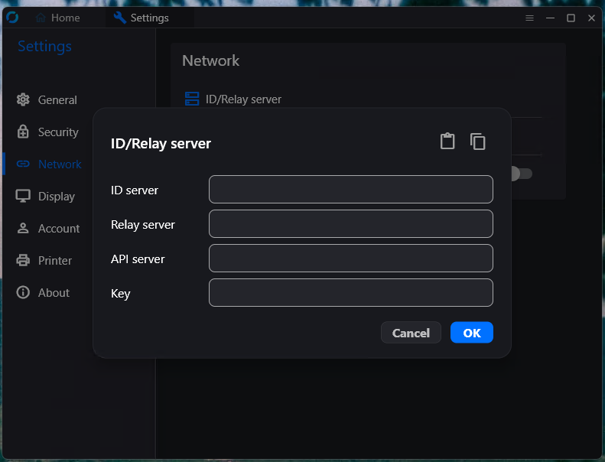
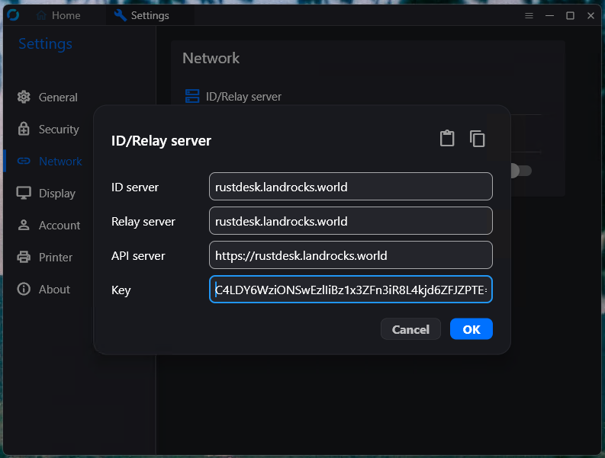
Click on the “three dots” (as marked in the picture), select “Network” and click on “Unlock network settings”, the select “ID/Relay server”:
Press OK, and click on “Home” in the upper left corner.
Congratulations, you have successfully installed a Rustdesk client on your system.
How to use Rustdesk:
On the left side you see your ID and your password. If you give this to somebody else, he or she can access your desktop.
If somebody else gives you his/her ID from their left side of the window, you can access his/her desktop by entering that ID in the “Control Remote Desktop” field and clicking “connect”.